Zenith Model 7S634R (7-S-634R) Restoration
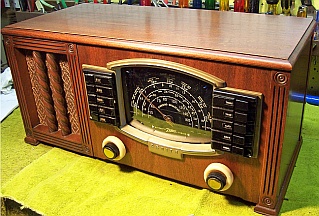 |
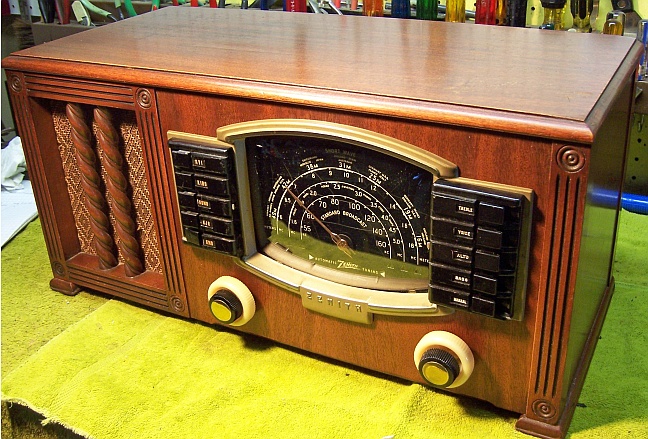
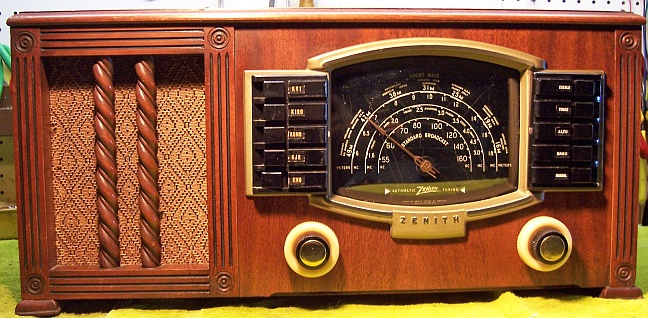
The Zenith model 7S634R (7-S-634R) (1942 model year) is a
large tabletop
7-tube AC superhet circuit radio.
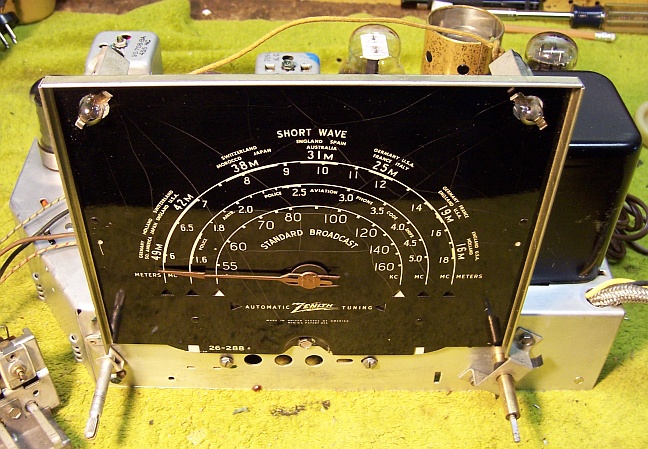
It receives the standard broadcast band and two short wave bands, and has
"automatic" or push-button tuning and the Zenith Radiorgan tone
control system.. This example had seen
minimal servicing in the past. I
decided to try to reverse any previous repairs to the extent possible.
The schematic for the Zenith 7-S-634R can be found on Nostalgia
Air. Any part numbers will refer to numbers on that schematic. |
My
antique radio restoration logs
Condition As Found
This radio was purchased on eBay. The cabinet was in
good original condition, as were the
knobs and grille cloth - just the usual wear, dings and scratches. The
radio was sold as working. There was no external evidence that the radio had been
restored other than the line cord which had been replaced. I always avoid knowingly purchasing a radio that has been
restored, as many collectors take shortcuts such as removing the original capacitors and filters. Unfortunately,
the radio had been very poorly packed and there was shipping damage.
Here's what greeted me when I opened the package:
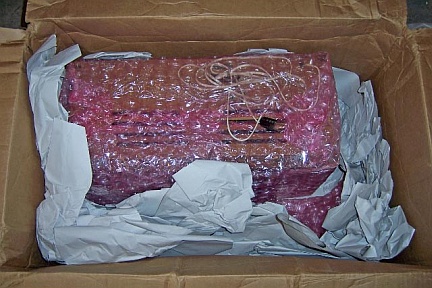
The
tuning shaft was broken at its weakest point (the groove where the retaining
C-clip is installed), likely due to the tuning knob having taken a sideways blow
during shipping:

The 6AC5G tube was broken (it was an original
Zenith). Fortunately, there was no other physical damage. The seller
refunded me $50 for the replacement parts. Fortunately, I was able to
obtain a replacement tuning shaft from the friendly and helpful people on Antique
Radio Forums (from a junker chassis) for the cost of mailing.
I had previously restored a Zenith model 7S633 radio, which uses a
very similar chassis (see Restoration Log).
But that radio had had extensive repairs including a replacement power
transformer. It had been badly hacked and the back cover was missing.
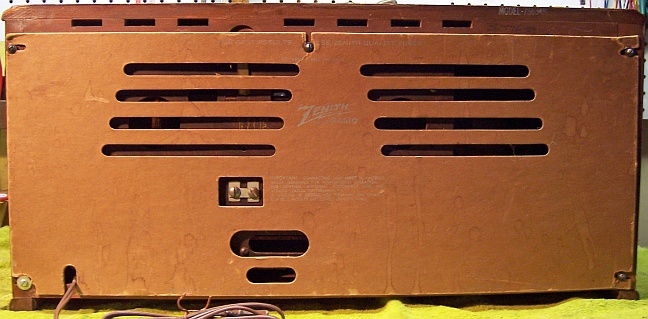
This radio was complete with only minimal servicing and had its back cover.
Circuit
The Zenith 7S634R is a 7-tube AC superhet circuit radio.
It has a tuned RF amplifier stage for the broadcast band only. The
Wavemagnet loop antenna is also only used for the broadcast band. Short
wave reception requires an external antenna. The radio
features the Zenith Radiorgan tone control system with five adjustments, and also
has automatic or push-button tuning.
Previous Repairs
-
A 6X5GT was installed (should be 6X5G). Only a few
tubes were branded Zenith, so they had likely been replaced.
-
Only two paper capacitors had been replaced: C14 (1st AF
grid coupling) and C21 (quality capacitor).
-
All resistors were original.
-
Two tacked in tubular electrolytic capacitors had been
installed to replace two sections of the filter capacitor C17-18-19. The
original filter was still in place, and one section was still being used
(C18).
-
The power cord had been replaced.
-
The dial drive cord had been patched and part of it replaced
with string
-
Several original capacitors had leads cut and then tacked back
together - I suppose to test them.
Survey
My usual restoration procedure is to first make a complete
survey of the condition of all components. The survey results guide my
restoration strategy. If major or unique components are defective or
missing and
cannot be restored or replaced, I may elect to sell the radio rather than restore it.
I always assume that all paper and electrolytic capacitors are leaky and thus should be
replaced (I always "restuff" the original containers if possible).
Any mica capacitors are assumed OK until testing proves otherwise. I
did not test the radio prior to restoration, and especially since there was
shipping damage. But I am confident that the radio would have worked prior
to shipping. So I did not suspect any major component problems.
The
automatic tuning unit (push button assembly) was first disconnected in order to
prevent damage to the fragile coils during handling of the chassis. Fortunately, only four wires had to be
disconnected. I found:
-
The speaker field, output transformer, power transformer, and all RF and IF
coils and transformers were good. There was signs of leakage of
wax around the power transformer, indicating it may have overheated at some
point. But the high voltage was balanced across the center tap (with
20 volts applied through a Variac) and power consumption was very low (about
5 watts) with full line voltage and no load.
-
The tuning shaft was broken in shipment.
-
The 6AC5G tube was broken in shipment. The 7B8 converter tube tested
weak. The remainder of the tubes were good, including the quite pricy
6P5G!
-
The tuning capacitor mounting grommets and chassis washers were bad - almost always the case.
-
Some rubber covered wire was bad - the insulation would crumble and fall
off if the wire was moved even a slight amount. Any bad wiring
would have to be replaced, including the wiring to the tone control panel.
-
Three resistors had drifted and were now out of tolerance. Strangely,
all were 47K 1/2 watt carbon composition types! All of the original
dogbone resistors were in tolerance.
Repairs
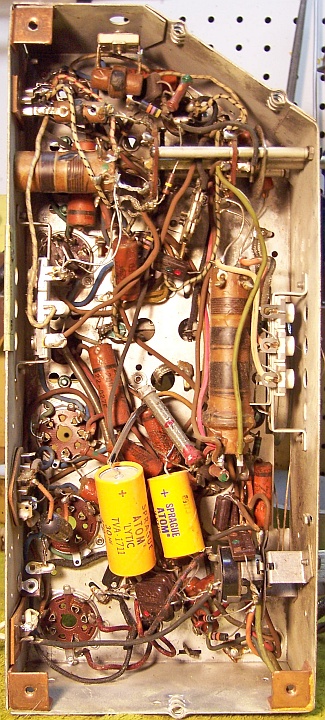
All tubes and shields were removed. I removed the tacked in filter
capacitors and moved components that were originally connected to the
lugs of the filter capacitor back close to where they were originally. I then took
a photo of the chassis
bottom so that routing of wiring and component placement could be restored.
Lead dress is often critical in radios. At this point, the chassis bottom
looked like this:

I then removed all the non-original components, documenting their locations
and connections. The volume control was removed for access. The tone
control panel was disconnected (its wiring would have to be replaced anyway).
The tuning capacitor was then
removed for cleaning access to the chassis, and to replace the mounting grommets
(I used standard 5/16" rubber grommets). The triple filter capacitor can was
removed for restuffing. When I replace a component, I
always remove the original part (or wiring stubs left over from past component
replacement) completely from a terminal. Other
components connected at the terminal are protected from heat using old medical
clamps. Excess solder is then removed using a solder sucker in order to
expose terminal holes for reattachment of the rebuilt or replaced component.
The top of the chassis was cleaned with GoJo hand cleaner and 00 steel
wool. This process often leaves behind metal fragments which can cause
shorts, so I then went over the chassis with a small magnetic screwdriver to
retrieve them. The tuning capacitor (previously removed) was cleaned in an old Heathkit ultrasonic
cleaner with dilute ammonia. After drying, the bearings were lubed with
Lithium grease.
Resistors and Capacitors
All the original Zenith paper capacitors were rebuilt in their original cases
using modern 630 volt film capacitors in order to maintain the original
under-chassis appearance. I reseal the cardboard tubes using rosin
salvaged from servicing RCA Radiola Superhet catacombs (it melts at a low temperature and will not damage
the replacement capacitors. Since two original Zenith capacitors had
been replaced (C14 and C21), I searched my stock of old Zenith parts for the correct part
numbers. In
one case, I did not have the original Zenith dud part in stock for C21, (22-1119, .005mf,
1000 volts). So I used a Zenith 22-1016E shell
(also rated at .005mf,
1000 volts) and
restuffed it with a 0.0047mfd 630 volt film capacitor (this was C21, the tone
quality capacitor). I did have an original dud for C14 in stock (.004mfd,
600 volts).
Some of the components that had to be replaced were buried beneath the band
switch. These were VERY difficult to get to without damaging other
parts, but I managed.
The original filter capacitor C17-18-19 (15+5mfd @ 450 volts and 15mfd
@ 350 volts) was rebuilt in its original case. It was restuffed using new
15mfd/450, 15mfd/350, and 4.7mfd/450 volt radial electrolytic capacitors. The original can was restuffed using the
following technique:
- The crimp around the base was uncrimped using a variety of tools, starting
with diagonal cutters.
- The fiber terminal board, rubber seal and fiber backer were removed after the aluminum
connecting the terminals to the body of the capacitor were cut.
- The rubber sealing layer was removed and discarded
- The old contents were removed without difficulty by grabbing with needle
nosed pliers and pulling.
- The old can was cleaned out using lacquer thinner, as were the terminal
board and fiber backer board.
- The fiber backer was epoxied to the underside of the terminal board in
order to retain the original terminals.
- Holes were drilled through the fiber backer and terminal board close to
the terminals.
- The uncrimped edge of the can was straightened as good as possible using
flat pliers.
- The new components were installed inside the old can. Leads for the
common ground and three positive leads were routed through the drilled holes
and attached to the original terminals.
- The terminal board assembly was reinstalled and the crimp on the base restored.
The three 47K 1/2 watt carbon composition resistors that were out of
tolerance were replaced. I had no 20% tolerance resistors in stock (and
they are no longer available new), so I
had to use 5% and 10% tolerance replacements, which are similar to the Zenith originals but have 4 color bands rather than 3.
Wiring
Some of the original rubber covered wiring had to be replaced. The
insulation would crumble and fall off if the wiring was moved even the slightest
amount. If the insulation was intact and not disturbed, I left it in
place. Several wires that were in danger of shorting to adjacent
components were replaced. The cable to the tone control panel had to be
replaced, as it is subject to movement during servicing, and already had several
wires that were bare in spots. The most difficult part of this repair was
threading the new leads through the braided shield! Unfortunately, no available
replacement wire looks similar to the original type, so I was forced to use new
cloth covered hookup wire to replace it (using the same or similar color if
available).

Tubes
A new 6X5G tube was installed to replace the existing 6X5GT. A NOS
6AC5G tube was purchased to replace the one broken in transit. The 7B8 tube was
weak and was replaced. The remainder of the tubes were good.
Other Repairs
The volume control and switch was cleaned with GC Big Bath spray cleaner. The push-button tuning contacts
were also cleaned using Big Bath followed by lacquer thinner on Q-tips and pipe
cleaners.
The dial cord was replaced. The original spring was reused.
Testing and Alignment
Once the radio was reassembled and the tubes installed, power was brought up
slowly using a variac. AC power consumption was monitored using a watt meter, and a
DVM monitored the B+. The set came alive and worked
immediately. The set was then aligned - no surprises. The push buttons were
adjusted to local stations without difficulty.
The set worked well on all bands, and the Radiorgan tone control operated
correctly.
Restoration Results
Deviations: cloth covered wire vs. rubber, 5% and 10% modern resistors vs. 20%
originals, vinyl grommets vs. gum rubber, one wrong capacitor part number.
|
Chassis Before Restoration |
Chassis After Restoration |
 |
 |