
My antique radio restoration logs
When I first started repairing or restoring antique radios I would routinely replace all wax/paper capacitors using standard yellow tubular metal film capacitors. I would of course restuff Philco bakelite block capacitors, since their terminals were needed to connect other components in the radio. Later on, I began restuffing most paper capacitors, retaining their original containers. This was especially true for radios I intended to keep. I became obsessed with retaining or restoring the original under-chassis appearance. But there are several type of capacitors which are difficult, if not impossible, to restuff. One type is the famous "Bumble Bee" plastic type. Another is the type of capacitor found in early 1930's RCA and GE radios that look like a block of tar:
The outer paper cover (which may have a part number) can be removed and saved. What is left looks like a block of tar:

My guess is that the original wax/paper capacitor was dipped in tar in order to seal out moisture, and then wrapped in a paper-like material stamped with the identifying part number.
My restuffing/reproduction process for these capacitors is as follows:
The paper cover is first removed by heating with a heat gun and carefully unrolling the cover (the joint can be teased open using an Exacto knife).
The excess tar is removed from the paper wrapper by heating with the heat gun and wiping with a paper towel. I leave some of the tar on the wrapper so the reproduction will look much like the original.
Before the inner tar blob is discarded, I measure the lead lengths needed and note if the original lead had an insulating sleeve. The approximate positions of the original leads are also noted. Note that in most cases, the leads are OFFSET - not straight across.
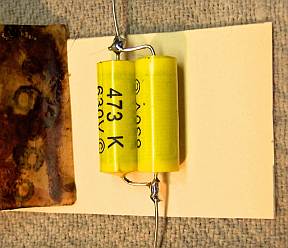
I chose an axial film capacitor of the appropriate size (I use 630 volt capacitors for all replacements) and splice on longer leads if required for the application. The original leads are longer and sometimes thicker gauge than the leads on the film capacitors. The splice is done about 1/4" from the body of the film capacitor, folded flat against the end of the film capacitor, and then straight out.
Most of these capacitors are oblong rather than round in
shape. I attach a piece of wooden dowel that is approximately the
same size (diameter and length) as the replacement film capacitor using
masking tape. As an alternative, I frequently use TWO capacitors in
parallel. For example, if the original capacitor was 0.1mfd, I would
use TWO 0.047mfd capacitor in parallel, with their leads OFFSET. This
solves both the lead offset and component shape problems, but does require
two capacitors. Another problem this solves is that sometimes a large
value 630 volt film capacitor is fatter than the original component (for
example, 0.47mfd).

Some original capacitors were double (like the tone
capacitor above). In this case, I tape the two film capacitors
together. Two leads are combined on one end, with separate leads for
the other end.
I then cut manila folder material to about 1/16"
narrower than the original paper cover and about 3" long.
The manila material is then wrapped around the film
capacitor and dowel, glued, and clamped until dry. I use yellow
carpenter's glue for this, but hot glue could be used to save time.

The original paper cover is then wrapped around the manila material and secured using melted rosin. If there is a part number on the original wrapper, make sure it is outward and visible. The rosin I use is drained from RCA catacombs, and is a mixture of rosin, wax, and other ingredients that melt at a fairly low temperature. I you do not have access to this material, you could use appropriately colored caulk or even hot glue.
I then fill both ends of the capacitor using rosin. Again, caulk or even hot glue could be used. If there are spaces visible looking into the ends of the capacitor, I first fill these in using a small piece of tissue paper so the rosin will not run through. And I also secure the outer wrapped using a rubber band during the filling process. Otherwise the rosin securing the outer wrapper may melt during the filling!
Completed Reproductions:

